


Yet Another Privacy-Focused Android ROM: IodéOS
An initial look at the IodéOS Android ROM that focuses on the key features and setup.

Hello internet, Matthew here from Forensics with Matt and I will be talking to you all about and Android ROM called IodéOS today. It is a privacy-focused ROM that has some cool privacy features that you might really enjoy.
This post will be broken up into some major sections: Installing IodéOS, Setting it up, and the special features of IodéOS. So now, without further Adieu, let’s get into this.

Installing IodéOS
Installing IodéOS is fairly simple. There are three ways of doing it:
With a graphical installer.
Via a premade installer on the terminal.
With ADB on the terminal.
Technically, you must download the Android Platform Tools and the drivers for the phone you want to put IodéOS on first. You’d do this by going to the command line of your computer and looking for a package with a name similar to android-platform-tools and installing that. Once that is installed we can move forward.
Each of the two installers works similarly. You have to first put your phone into a state that can recieve a custom ROM. This is done by going to your developer settings and turning on USB Debugging and OEM Unlocking. Now plug your phone into your computer. If everything is set up corrrectly, you will see a prompt that looks like the one in Figure 1.

Figure 1: ADB USB Debugging “Allow USB Debugging” prompt.
Once you are all set, you can choose to run either of the installers or do it yourself. In order to use the installers, you must rebooot to the bootloader and unlock it before continuing.
Do so by using the command sequence:
adb reboot bootloader
fastboot flashing unlock
(Please note that the second command may not work for your phone. Please consult modding guides for your phone to verify the correct command for unlocking your bootloader.)
Next, run the installation software. You will be able to essentially skip quite a few steps if you do the bootloader unlock and enabling of USB Debugging and OEM Unlocking first. Both installers will check that your phone has these settings enabled before installing the new OS. After the checks are complete, you will be able to proceed with the fresh install. Wait a few minutes for the installer to install the new OS on your phone. Once that is done, you will be prompted to re-lock the bootloader. You may skkipe this step if you’d like.
Take a look at the video in Figure 2 to see what I’m talking about.
Setup
There is nothing special about setting uoIodéOS. It is much like all other versions of Android. The main thing that is different avout the setup is that it doesn’t make you connect to Google services. That means the normal installer has fewer steps to it!
The usual steps that begin with starting an internet connection, setting up a password and fingerprint, and enabling backup are the same on here.The diference between standard Android setup and IodéOS setup is that IodéOS allows you to restore from open source backuos, like Nextcloud and DAVx, instead of Google. This is a great thing for privacy-conscious people who don’t want to be giving their location and personal information up to Google.
Key Features
There is one main feature of IodêOS that separates it from many oher custom ROMs: its exclusive Iodé app. This app operates as a firewall that can be configured to block connections to many sites that are not privacy-respecting or are under companies like Google, Facebook/Meta, Cloudflare, or others that a privacy-conscious person would want to block.
When you open the Iodé app, you are taken to a page that shows the efficiency of your blocker and allows you to reinforce your blocking. Note that you are able to pay for the reinforcing features. This involves a subscription to the Iodé company. This subscription costs €4 per month. You are also able to take out a lifetin=me subscription if that is most convenient for you. Beyond that, there is a feature that maps the servers that you are connecting to and a per-app report that shows you where the blocked and alllowed connnections are coming from. Figure 2 shows the map feature and Figure 3 shows screenshots of the log features.

Figure 2: Iodé Map feature.
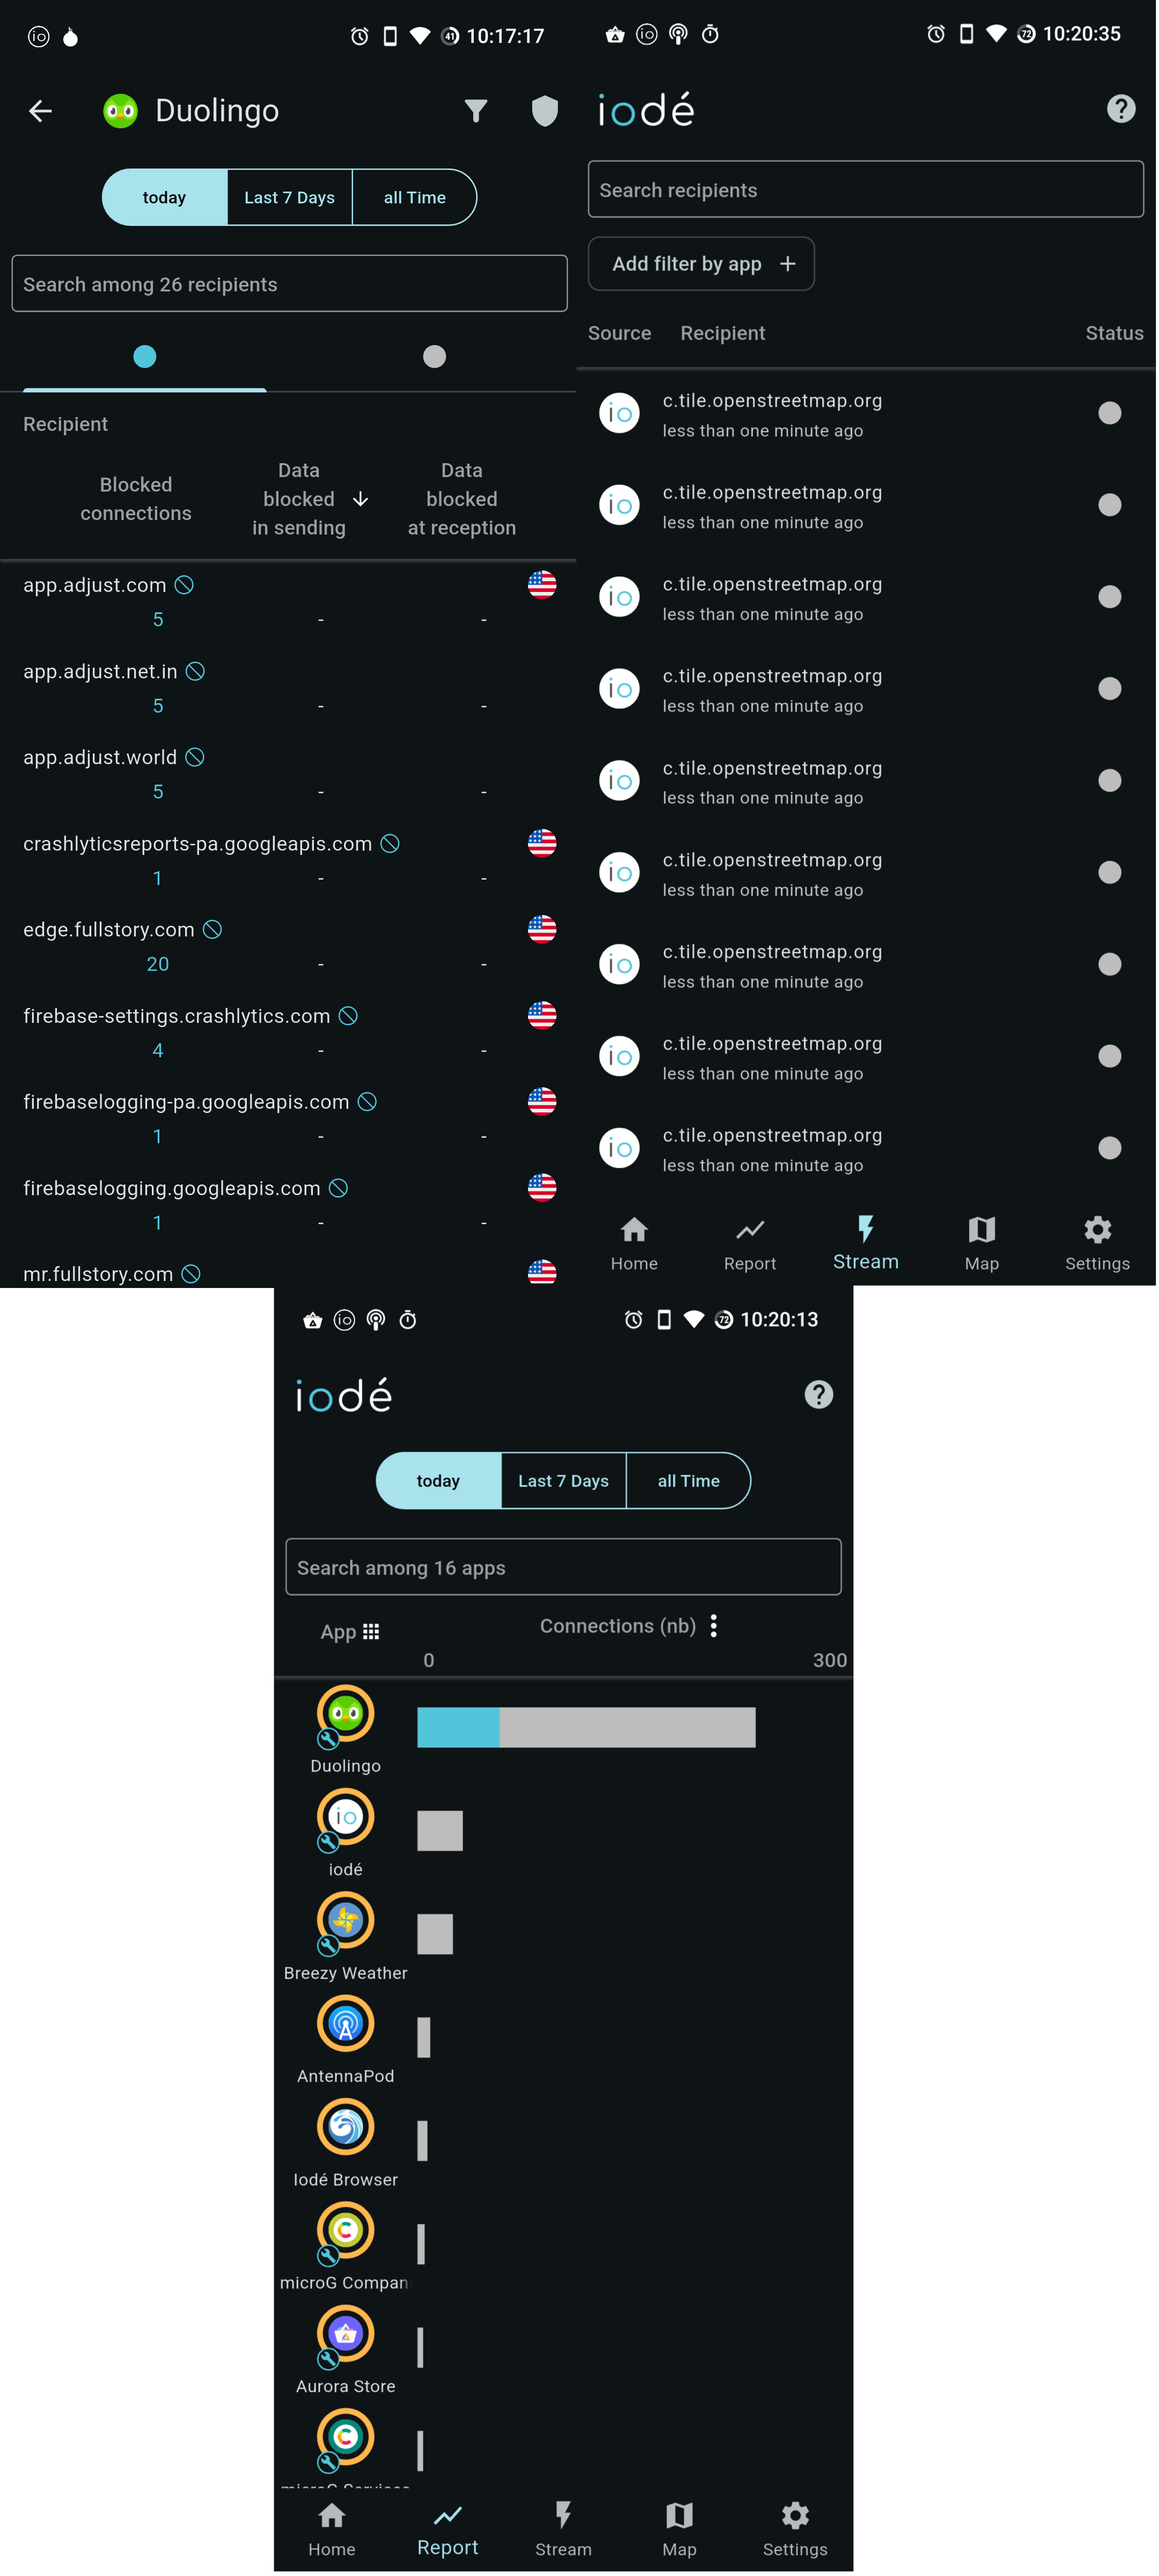
Fıgure 3: Iodé app internet logs
Another major feature of IodéOS is its open source nature. Since it’s based on LineageOS, it does not bundle any real Google Play Services. Instead, it has a truly open source alternative to Google Play, called MicroG. One is able to configure the behavior of these services.
When it comes ot other apps, IodéOS comes with the F-Droid store and Aurora Store for getting apps. It comes with Thunderbird Mail for looking at emails, it comes with Magic Earth for maps and it comes with open source apps for all other major functions.
Conclusion
In conclusion, the IodéOS Android ROM is a very promising option for those Android modders who don’t like Google and strive for open source apps. It contains a major feature that these people would like, in its traffic blocker feature. It also comes bundled with many open source apps so that the users don’t have to deal with Google. Even the implementation of Google Play Services is open source!
In my opinion, this is a strong contender for a great Android custom ROM. My favorite part of it is its Iodé app. With this app, I am spoiled for not needing to run an ad blocker to remove intrusive ads, calls to malware, and other internet annoyances from my everyday usage. I also like all of the open source apps as alternatives to the Google ones. My favorite one is the Thunderbird Mail client because it is my favorite way to access my email without a browser.
With that being sadi, I have completed my look at IodéOS for today’s blog post. I hope you enjoyed the read and learned something new today. If you did, consider subscribing and supporting my continuous development of this project. You may also share with your friends to spread the word. I hope you have a great day. Until next time, this has been Matthew talking to you about IodéOS. Until next time, Matt OUT!